java开发nexus私服搭建
针对一台全新的电脑,安装java开发的maven私服,记录如下,并在IDEA中进行测试。
涉及到javase安装,maven安装,nexus私服安装,nexus本地配置,nexus界面介绍
- 安装JAVA jdk ,下载javaSE安装包,注意JDK和JRE不要放在同一文件夹下
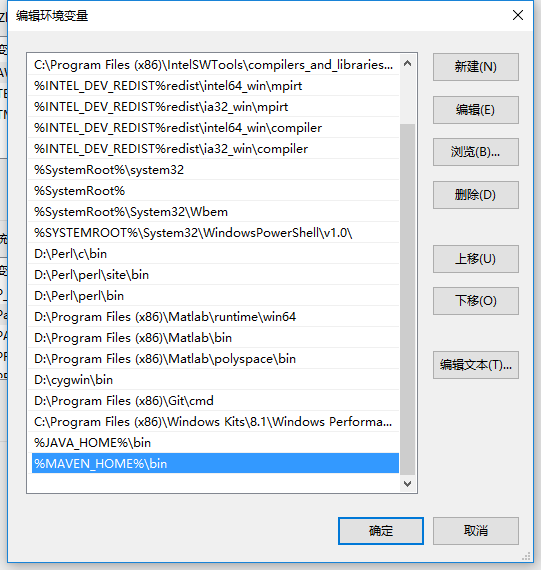
- 配置JAVA_HOME为JDk目录,并添加JDK的bin目录(%JAVA_HOME%\bin)到path中

- 下载maven,并解压缩,配置MAVEN_HOME为maven的根目录,并添加%MAVEN_HOME%\bin到path
中


显示了mvn -v,也就表示装完了maven
4. 下载nexus2.14,在windows下使用管理员身份打开cmd,并cd到nexus的bin目录,进行安装
nexus install
nexus start
注意一定得配置bin\jsw\wrapper.conf的java bin信息,否则出错。
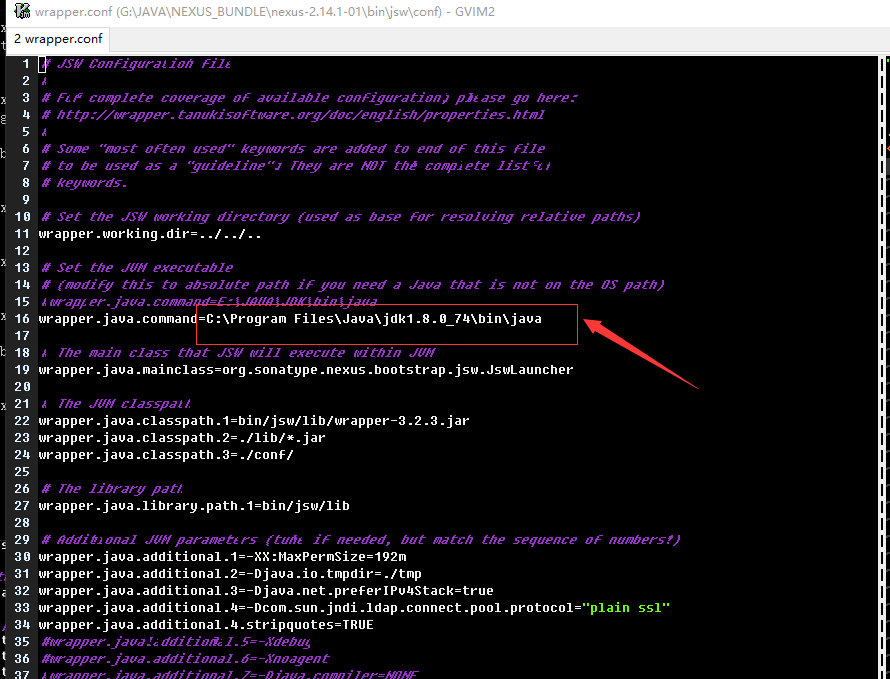
出现的错误为无法启动,

做完前面的几步之后只是,把配置环境弄完了,还得进行私服镜像配置。 首先打开nexus私服页面,使用`http://localhost:8089/nexus/#welcome `
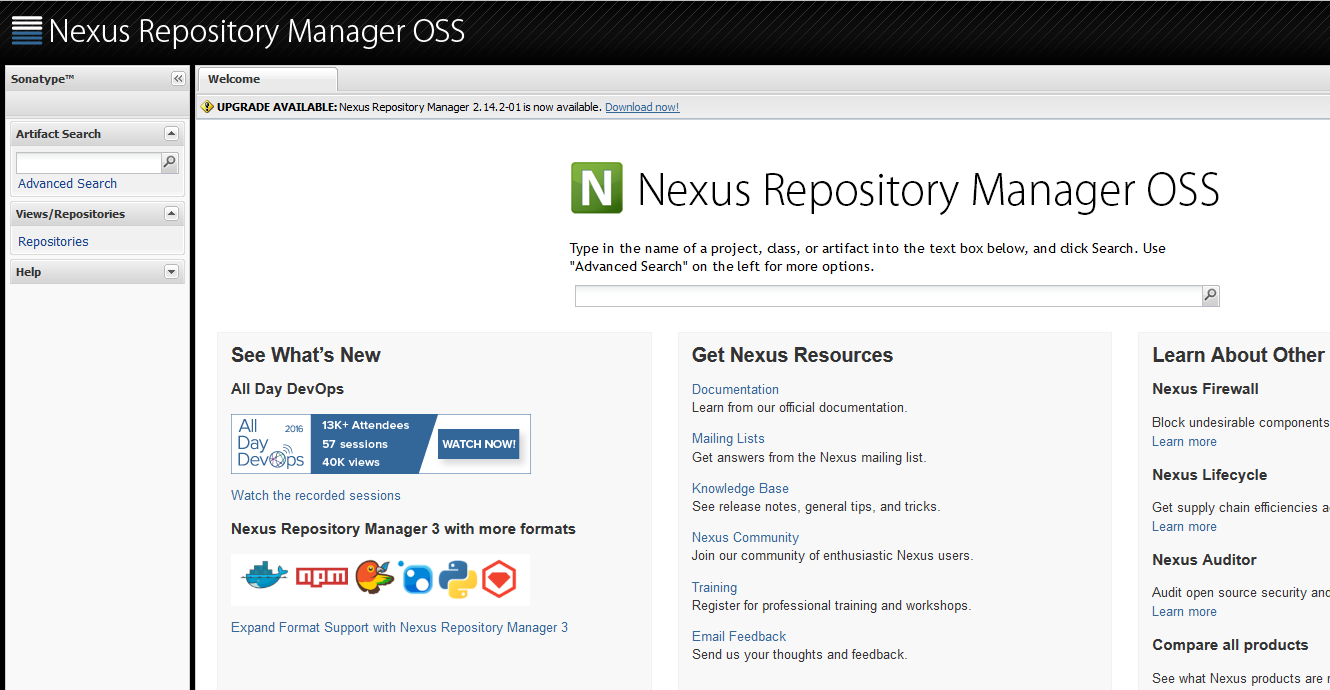
默认的登陆密码是 账号:admin 密码:admin123
登陆完的界面
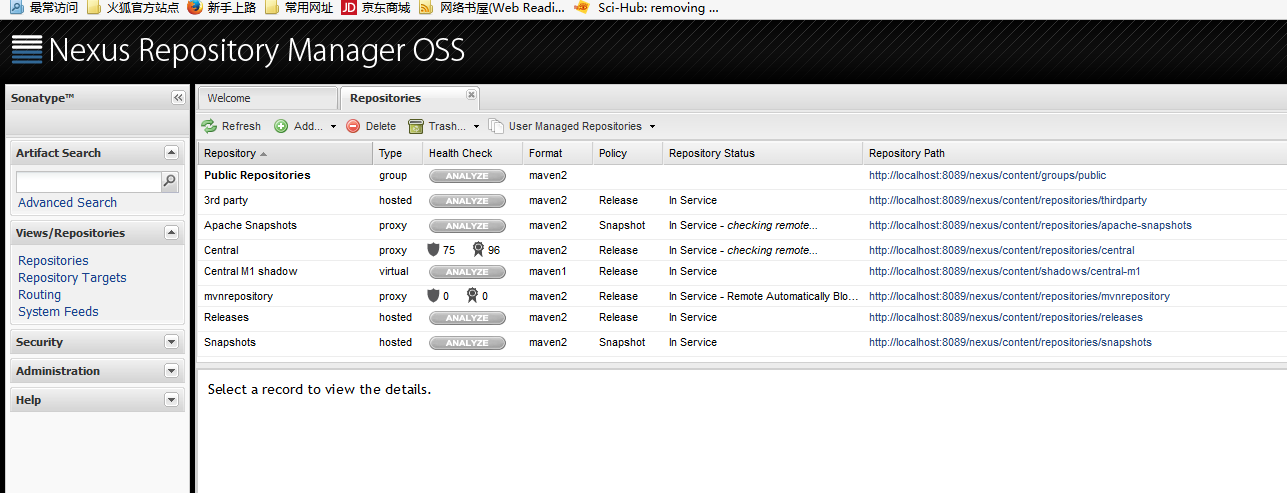
配置中心仓库:
中心仓库设置download remote indexes为真,为设置本地私服提供源。
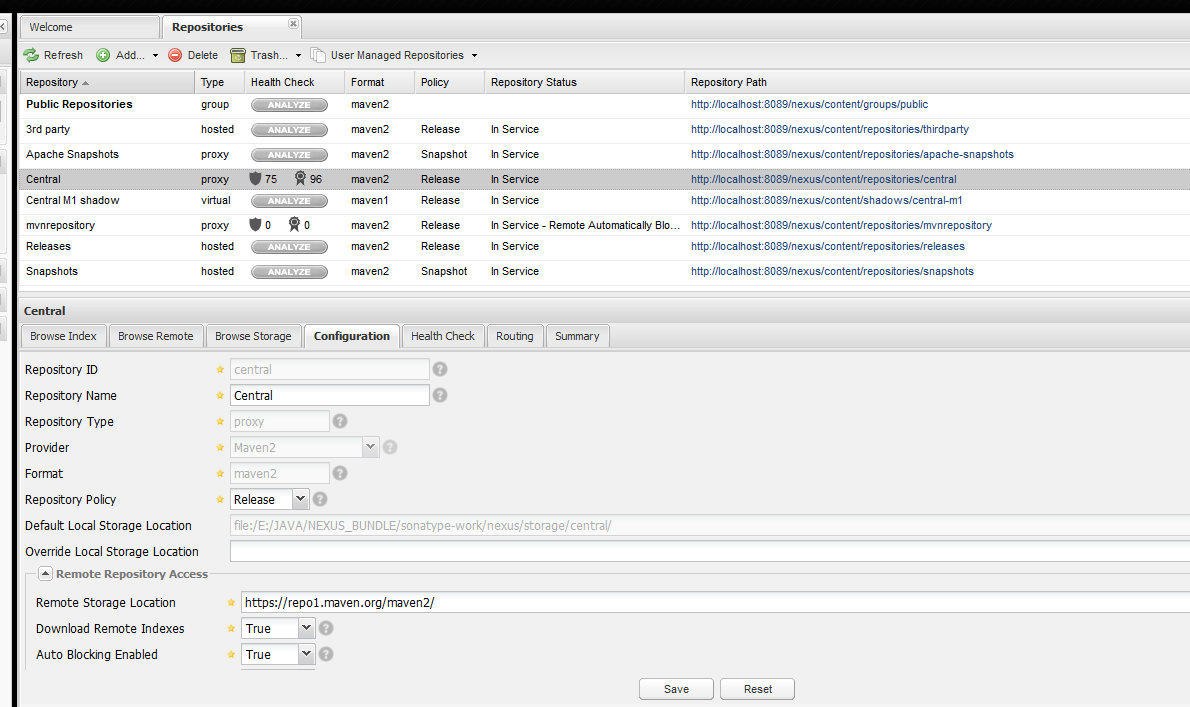
配置了release和snapshot仓库


然后配置了第三方插件

进入最关键的public Repositories设置
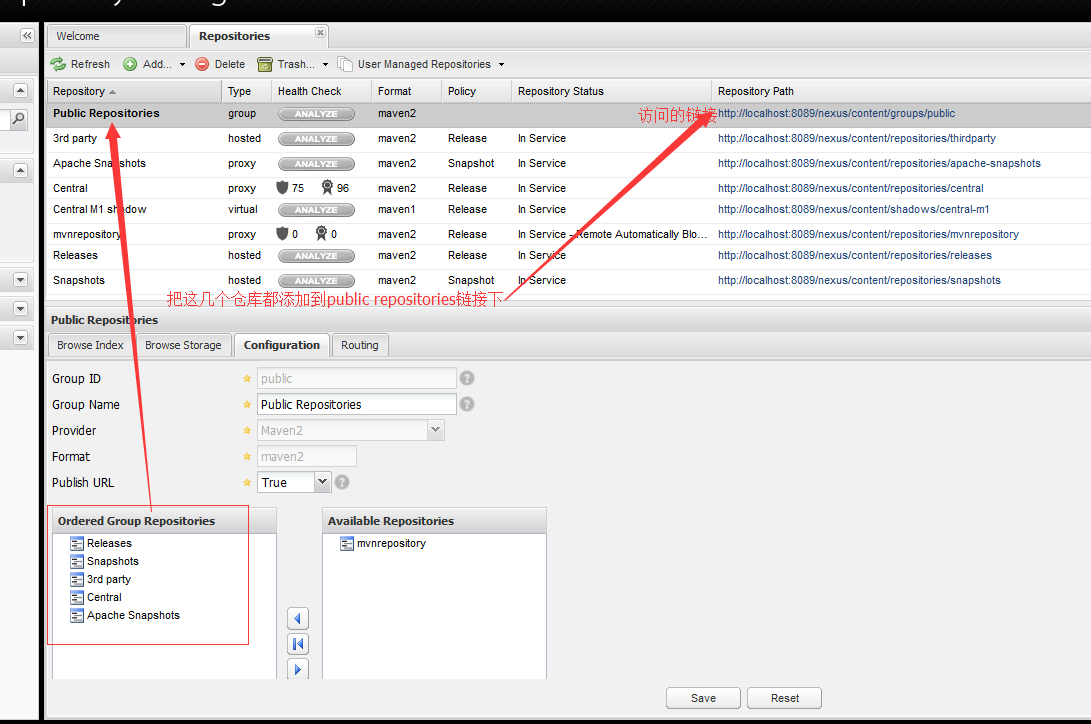
有时候可以使用试用Scheduled Tasks观看库的index是否正常进行。

镜像私服配置
maven中的settings.xml登陆私服的账户密码设置

  <servers>
    <server>
        <id>nexus-release</id>
        <username>admin</username>
        <password>admin123</password>
    </server>


    <server>
        <id>nexus-snapshot</id>
        <username>admin</username>
        <password>admin123</password>
    </server>


    <server>
        <id>nexus</id>
        <username>admin</username>
        <password>admin123</password>
    </server>
      <!-- server
     | Specifies the authentication information to use when connecting to a particular server, identified by
     | a unique name within the system (referred to by the 'id' attribute below).
     |
     | NOTE: You should either specify username/password OR privateKey/passphrase, since these pairings are
     |       used together.
     |
    <server>
      <id>deploymentRepo</id>
      <username>repouser</username>
      <password>repopwd</password>
    </server>
    -->

    <!-- Another sample, using keys to authenticate.
    <server>
      <id>siteServer</id>
      <privateKey>/path/to/private/key</privateKey>
      <passphrase>optional; leave empty if not used.</passphrase>
    </server>
    -->
  </servers>
镜像配置
注意url链接的端口设置
<mirrors>
<mirror>
    <id>nexus</id>
    <mirrorOf>*</mirrorOf>
    <url>http://localhost:8089/nexus/content/groups/public/</url>
</mirror>
</mirrors>
<profiles>
<profile>
    <id>nexus</id>
<repositories>
    <repository>
        <id>central</id>
        <url>http://central</url>
        <releases><enabled>true</enabled></releases>
        <snapshots><enabled>true</enabled></snapshots>
    </repository>
</repositories>
<pluginRepositories>
    <pluginRepository>
        <id>central</id>
        <url>http://central</url>
        <releases><enabled>true</enabled></releases>
        <snapshots><enabled>true</enabled></snapshots>
    </pluginRepository>
</pluginRepositories>
</profile>
</profiles>
<activeProfiles>
    <activeProfile>nexus</activeProfile>
</activeProfiles>
在maven中一般是需要设置下载控件jar包放在哪里,在没有私服的情况下,我一般 可以在setting.xml中设置localRepository
   | Default: ${user.home}/.m2/repository
  <localRepository>/path/to/local/repo</localRepository>
当然IDEA在导入项目或者新建项目的时候都会提醒Environment Variable,设置一下setting和local repository
(类似的思路需要在myeclipse配置)

镜像的话,就不会执行maven的mvn install等命令还一直向外部仓库访问链接,结果是访问的链接
都是本地的,可看下节测试。
IDEA测试镜像私服
现在只能通过这个激活了,下载license server ![license][20]测试结果如下:
mvn site

INFO] artifact org.springframework:spring-beans: checking for updates from nexus
[INFO] artifact org.springframework:spring-context: checking for updates from nexus
[INFO] artifact org.springframework:spring-context-support: checking for updates from nexus
[INFO] artifact org.springframework:spring-core: checking for updates from nexus
[INFO] artifact org.springframework:spring-expression: checking for updates from nexus
[INFO] artifact org.springframework:spring-instrument: checking for updates from nexus
[INFO] artifact org.springframework:spring-instrument-tomcat: checking for updates from nexus
[INFO] artifact org.springframework:spring-jdbc: checking for updates from nexus
[INFO] artifact org.springframework:spring-jms: checking for updates from nexus
[INFO] artifact org.springframework:spring-orm: checking for updates from nexus
[INFO] artifact org.springframework:spring-oxm: checking for updates from nexus
结论
整个配置过程有效,测试通过,进一步可以参考maven实战 许晓斌,里面包含了maven的坐标空间概念等,详细介绍了 maven系统的各个组成和集成测试环境的搭建。
可以拓展阅读java blog 三个有用工具包: